Getting hooked

Like for so many people, my daily lockdown walks kept me sane over the past year. I got into a habit of listening to podcasts or audiobooks when going out on my own. I enjoyed discovering quite a few excellent photographers that way and it was round about Christmas time as the second wave became inevitable and the new lockdown was announced, that I did get a bit low and felt I had to get my teeth into something – I needed a project. Only a few days after that realisation, I listened to a podcast interview with Jill Welham talking about her cyanotypes and found myself intrigued. I went onto her website to see her work and decided there and then that this would be my lockdown project.
As my friends and family know and you can see in my close-up photographs, I have always been very fond of plants and my favourite colour happens to be blue! So Cyanotypes instantly felt like a match made in heaven for me!
What are Cyanotypes?

The cyanotype process is one of the oldest photographic techniques and was developed by Sir John Herschel in 1842. A paper is coated with a mixture of two iron salts (ferric ammonium citrate and potassium ferricyanide) which, when combined, become UV-light sensitive. Once the paper is dried, an object (or a negative) is placed on top, usually covered by glass and the paper is exposed to UV-rich sunlight, leaving a silhouette of the object (and in the case of a placed negative, a positive). During exposure the chemicals turn from a yellowish-green to the characteristic prussian blue-cyan colour, giving the process its name. After exposure the image is simply rinsed thoroughly in a water bath, which washes out any excess solution and fixes the image at the same time. It is then hung up to dry. The colour continues to develop and deepen for the next 48 hours as the image oxidises. Herschel developed the process mainly with a view to creating cheap copies of notes and diagrams and it was used extensively in blueprints (which is also how they got their name).
Anna Atkins, a friend of Herschel’s, soon saw artistic application and published a book of cyanotypes of her extensive collection of seaweed only a year after Herschel invented the process.
Although it is classed as a photographic process, no camera is involved in the creation of cyanotypes.
Cyanotypes are relatively simple to make and there are a number of alternative processes to the classic blue & white cyanotype. They can be bleached or dyed with tea, coffee and a variety of other natural dyes. There is a lot of scope for creativity. Each image is completely unique and cannot be recreated.

First Attempts
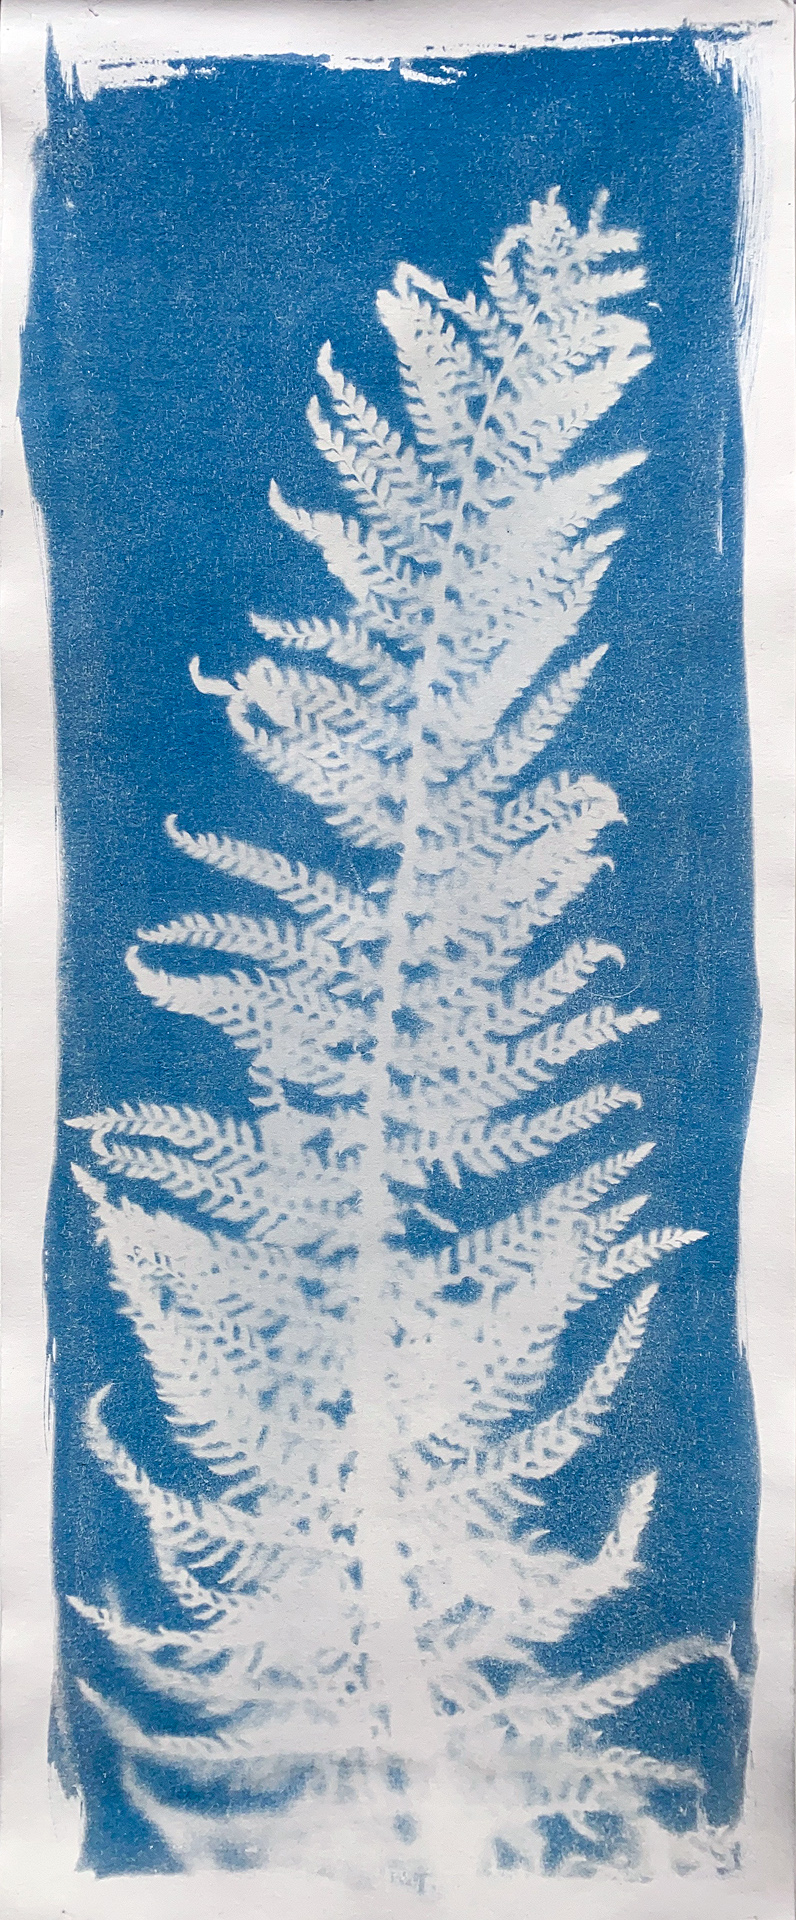
So after doing some research, buying books on cyanotypes and watching some YouTube videos I ordered up the chemicals, foam brushes & paper and in early January my son Lewis and I gave it a go. Experiencing the process for the first time was exciting, but the results were far from perfect. Below is my first image for which we used the classic cyanotype method. As always there is plenty to learn from your mistakes.
What was wrong?
The image turned out very pale, although I had exposed it about 4 times longer than I had thought it needed.
The simple craft paper I had used was very wavy after washing and drying.
The fern frond imprint was quite sharp and clear at the top but became increasingly fuzzy and lacked detail in the bottom part, where the frond stalk got quite thick and the glass plate couldn’t make contact with the leaves to press them against the paper.
What to do?
- I needed a thicker paper that could withstand being rinsed in water for several minutes and opted for a high quality 300gms watercolour paper.
- It was important to take a lot of care over coating the paper, as the slightest gap and variation in amount of applied solution shows in the print, so does every speck of dust.
- In Winter in Scotland there isn’t much UV light and it is much more difficult to get good colour depth unless you are using a UV lamp. Best results are during the longer days of late Spring, Summer and early Autumn.
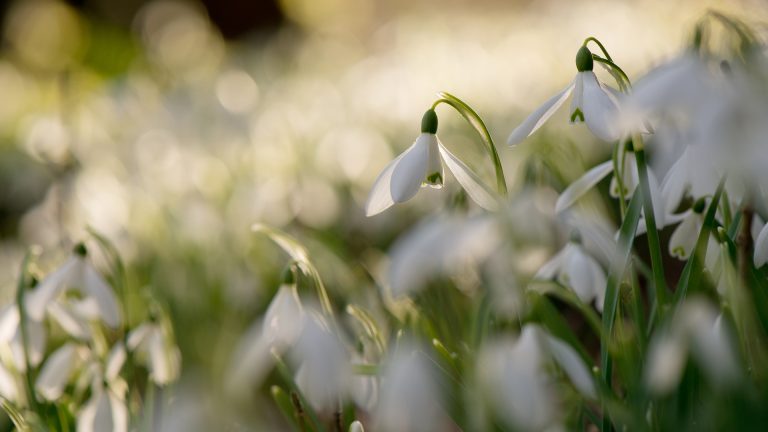
- I gradually got my thinking hat on as to suitable plant material that would work well with cyanotypes. In January there wasn’t much in the garden, but as soon as the snowdrops kicked off and there was growth, I started pressing leaves and flowers for future use and to make the process easier.
Wet cyanotypes
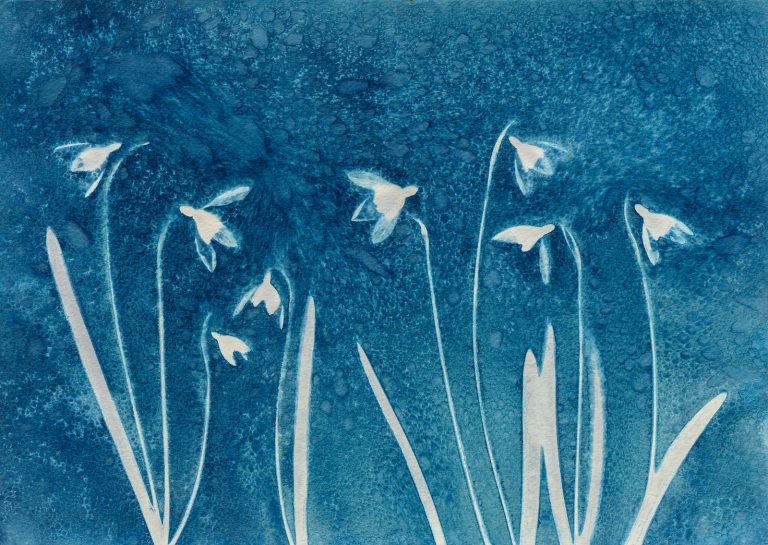
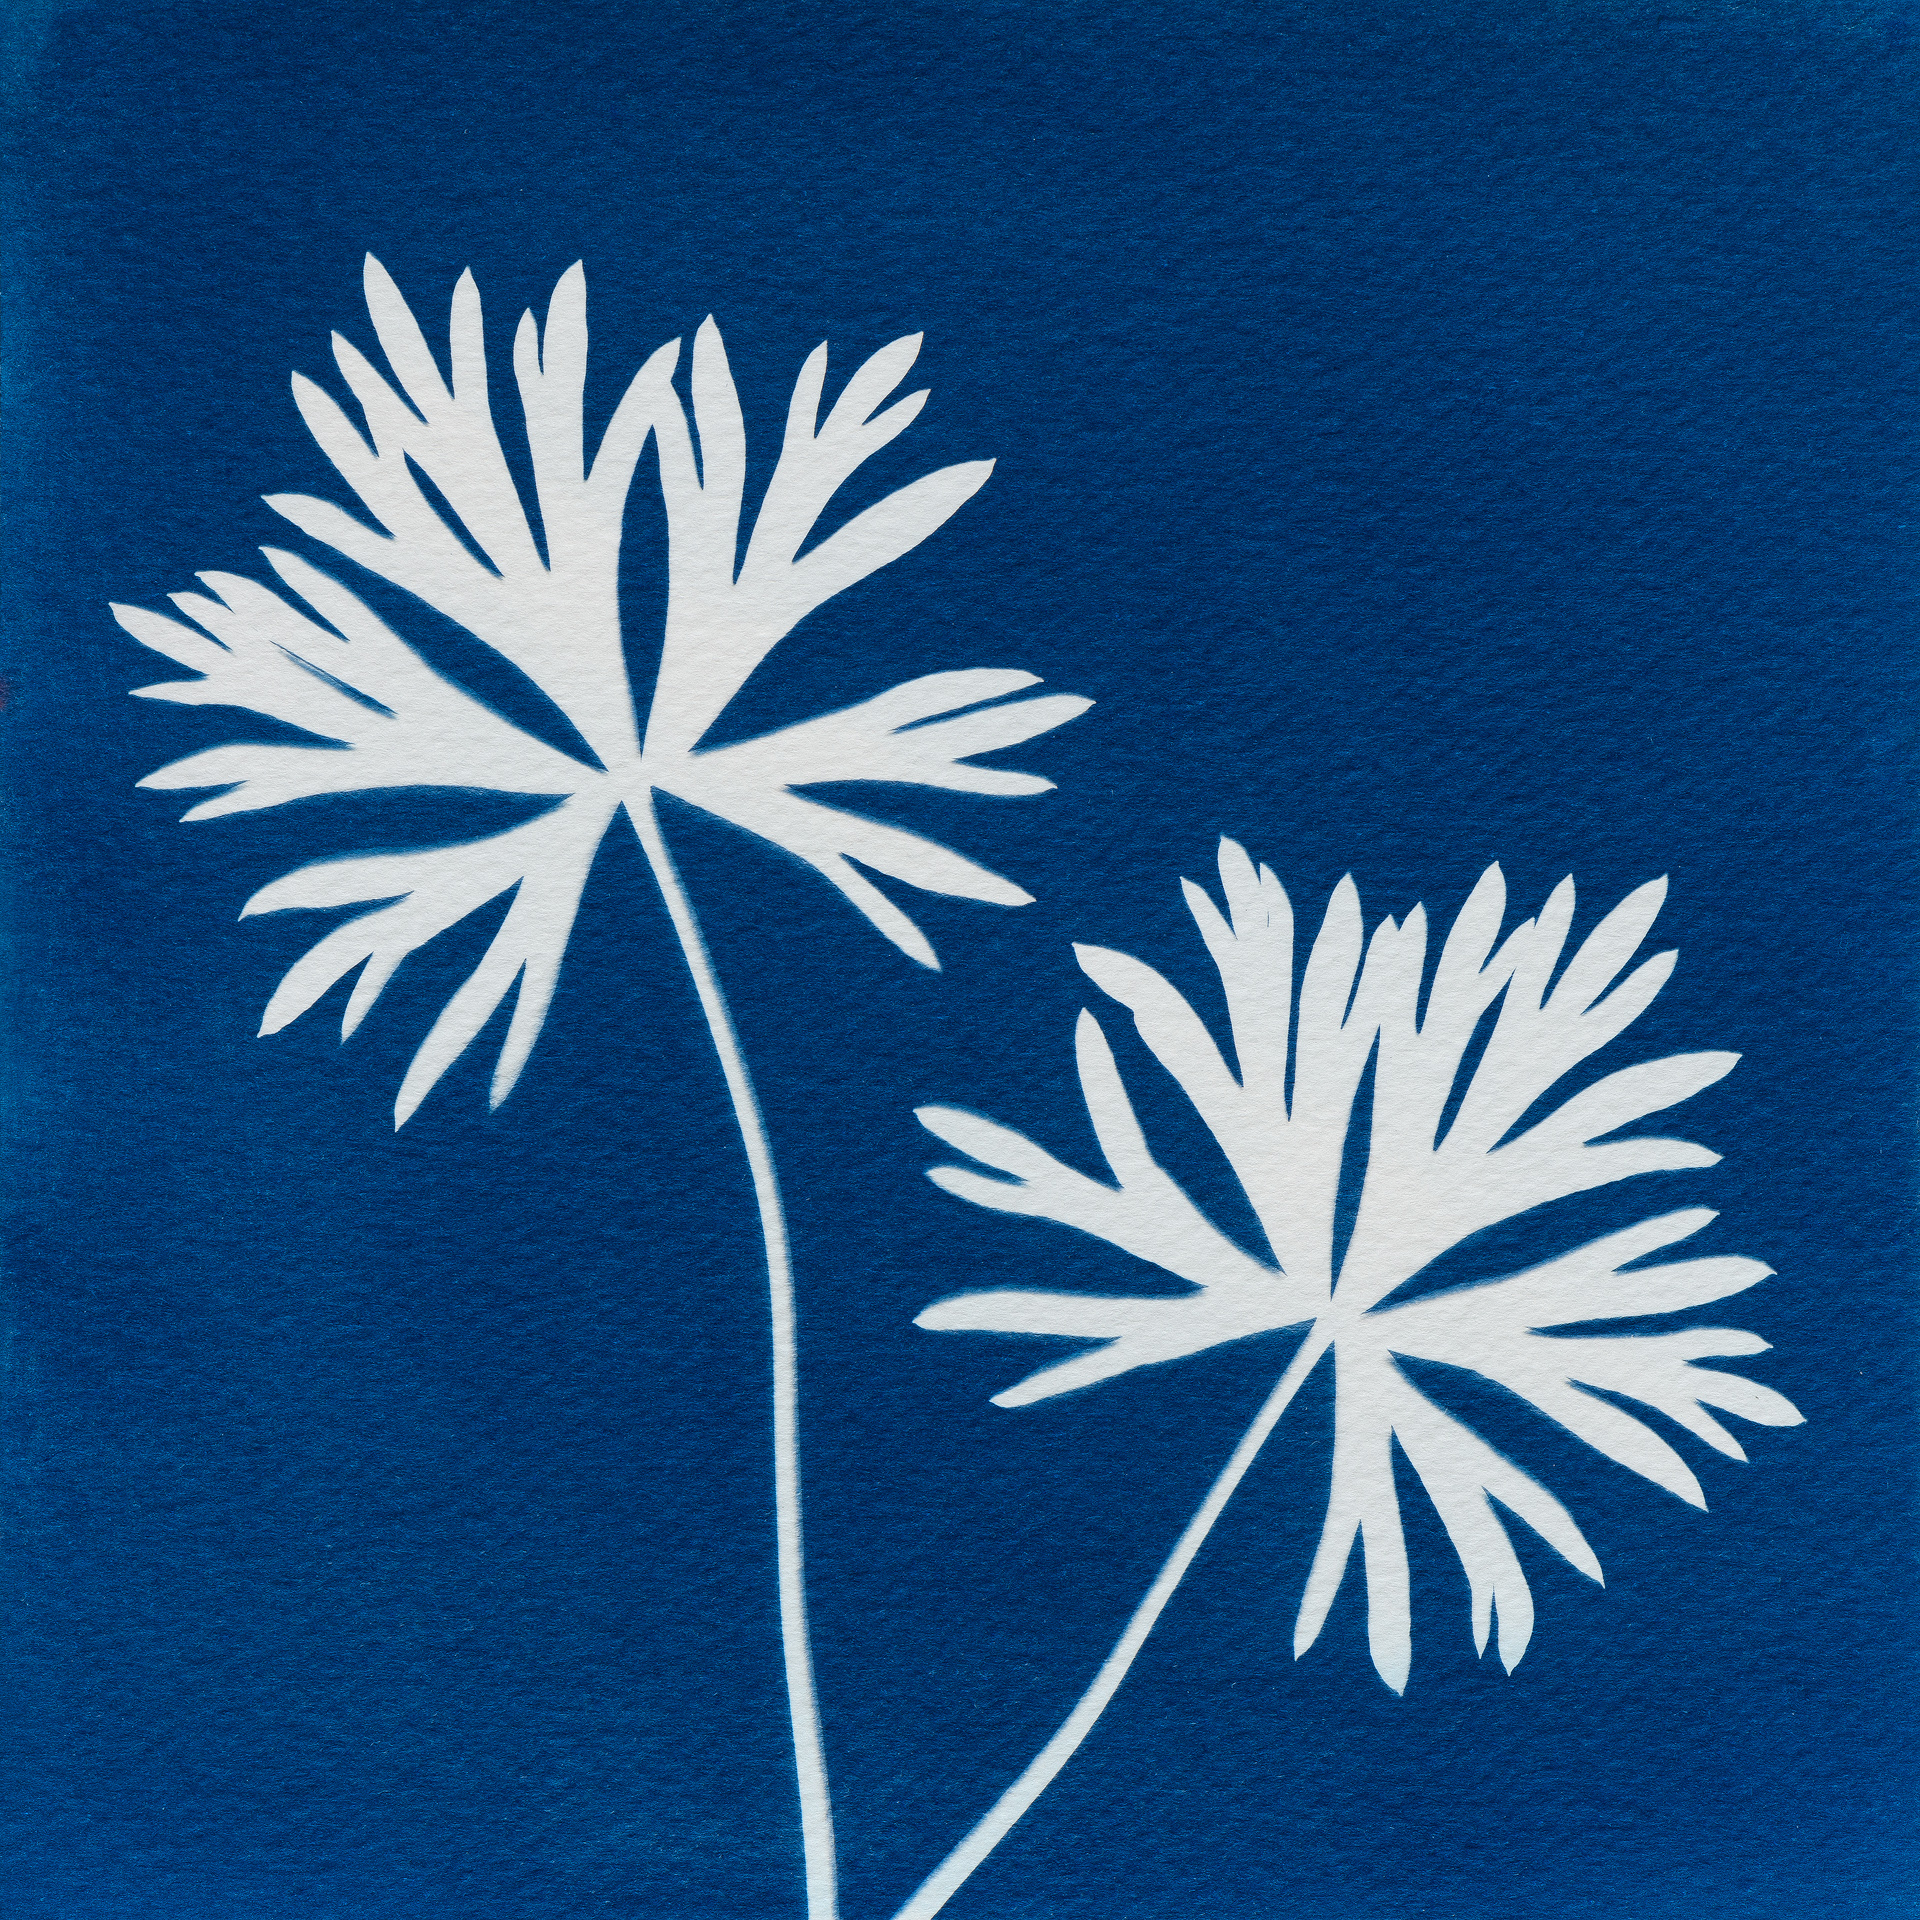
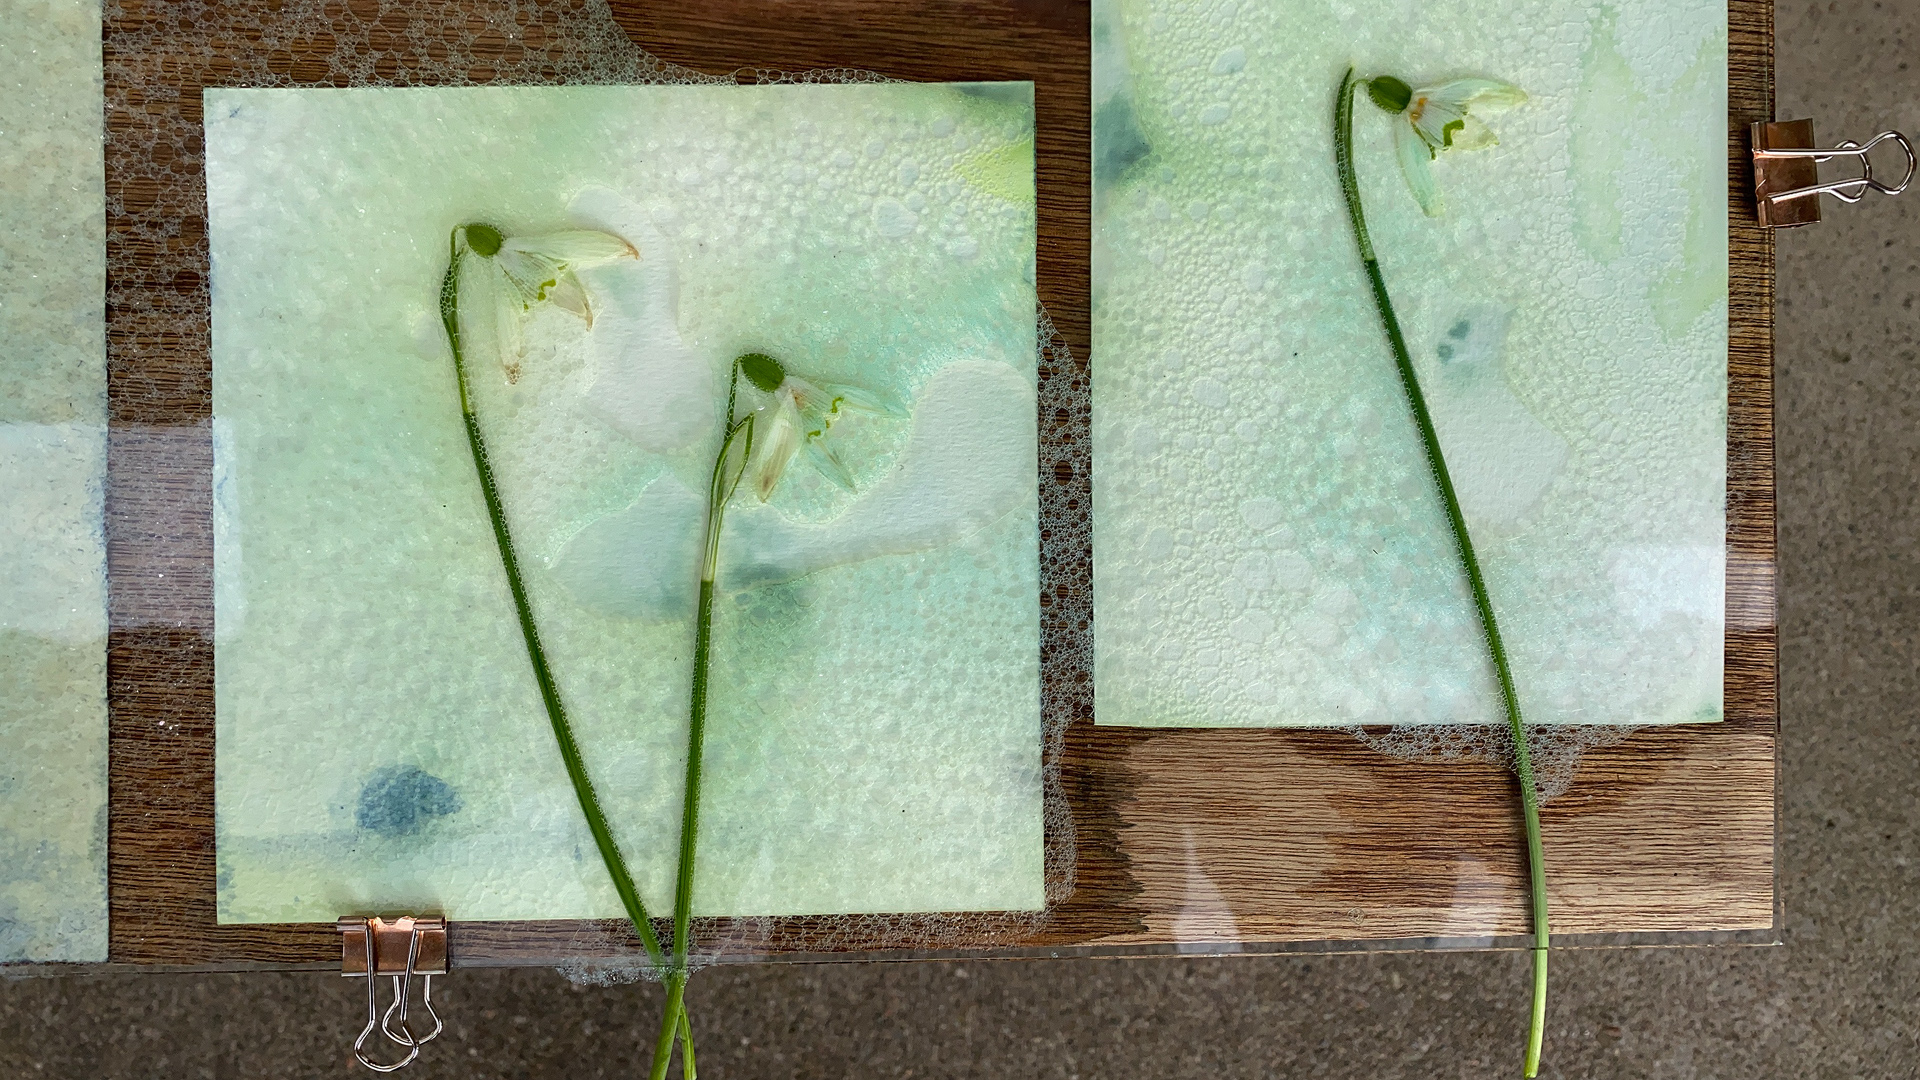
Although I used the classic blue & white cyanotype technique initially, I quickly moved on to an alternative technique called wet cyanotypes, which was first developed by Krista McCurdy and also employed by Jill Welham. You still pre-coat the paper with emulsion in a darkened room (to stop the exposure from starting), usually the night before. Before exposure, the paper is wetted again by placing it face down on a tray of soap bubbles made with washing-up liquid. The bubbles randomly stick to the paper. It is then sprayed with a vinegar solution, which affects the colours and helps to counteract the alkalinity of the soap bubbles. The plant is subsequently placed on top of the paper & covered with glass as usual before taking it outside to expose. The wet cyanotype process allows for much longer exposure times of several hours and gives scope for a greater variety of colours and textures to develop.
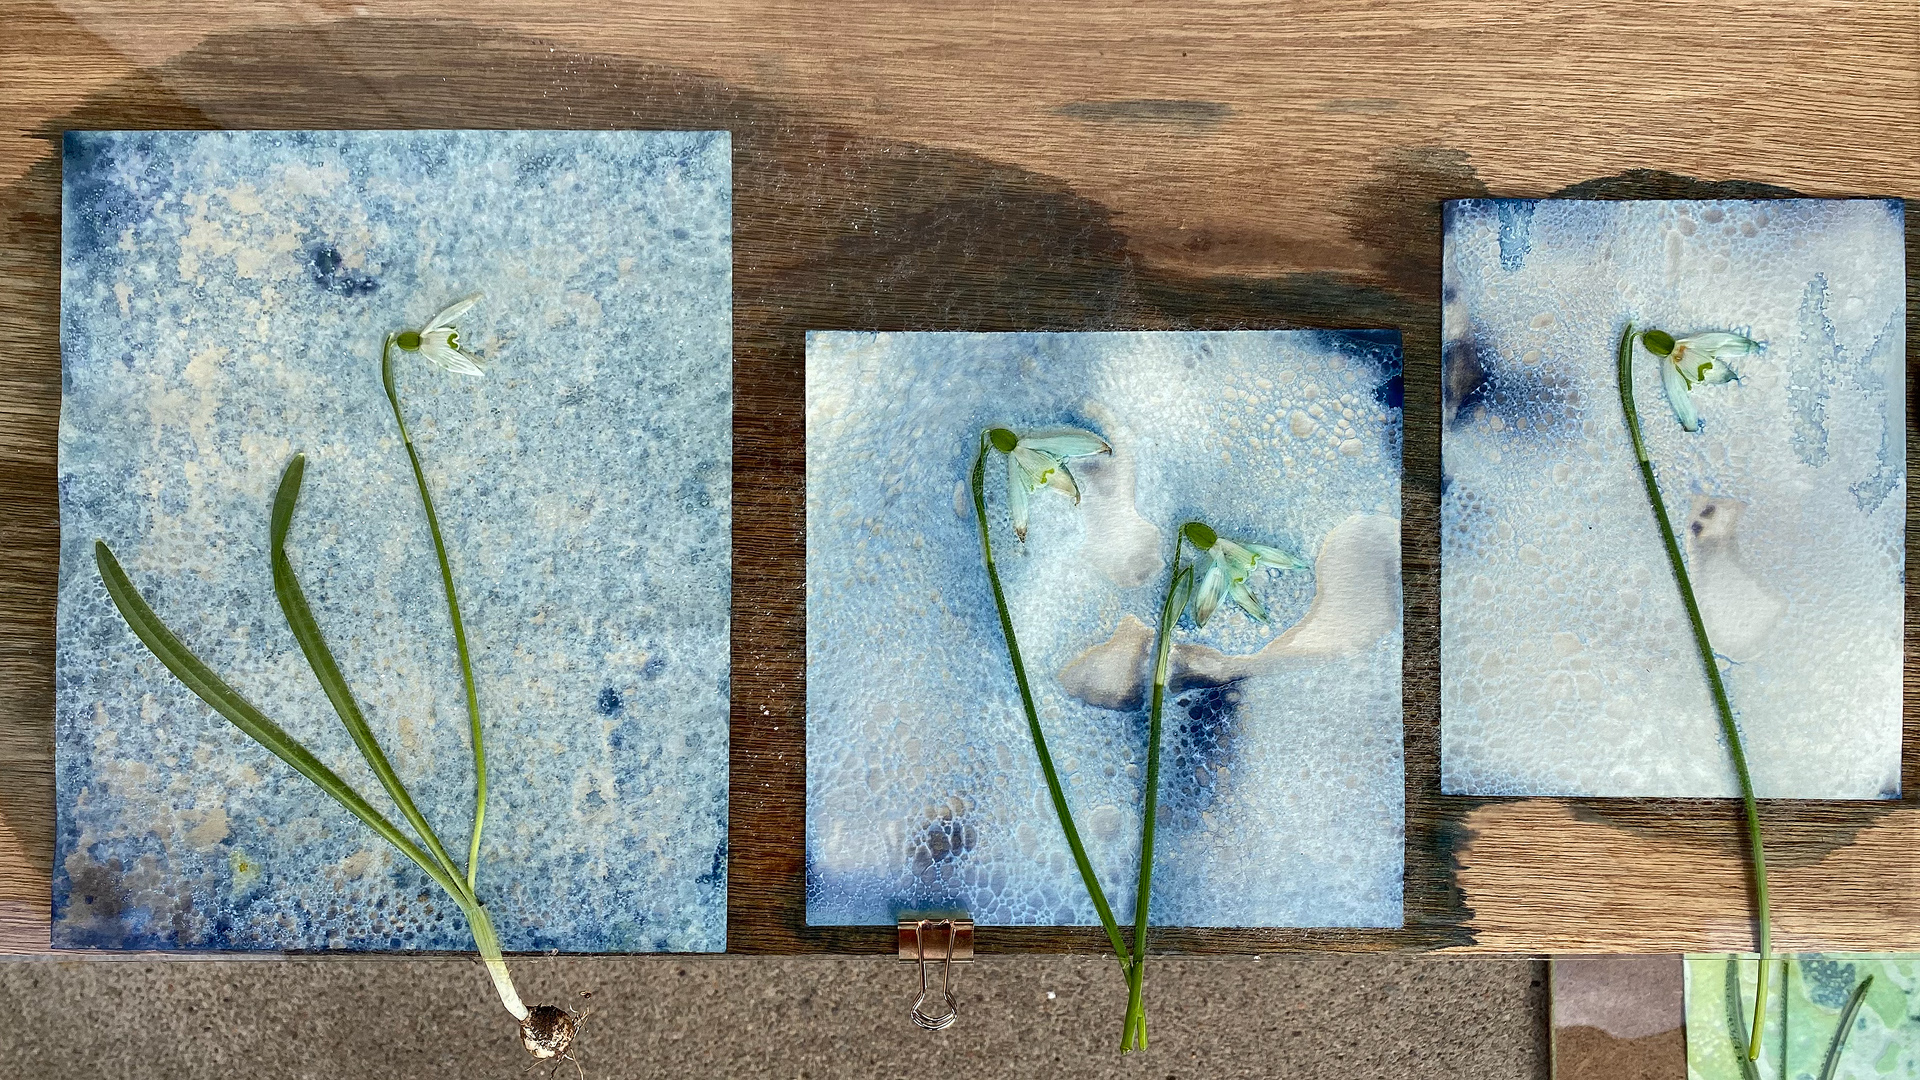
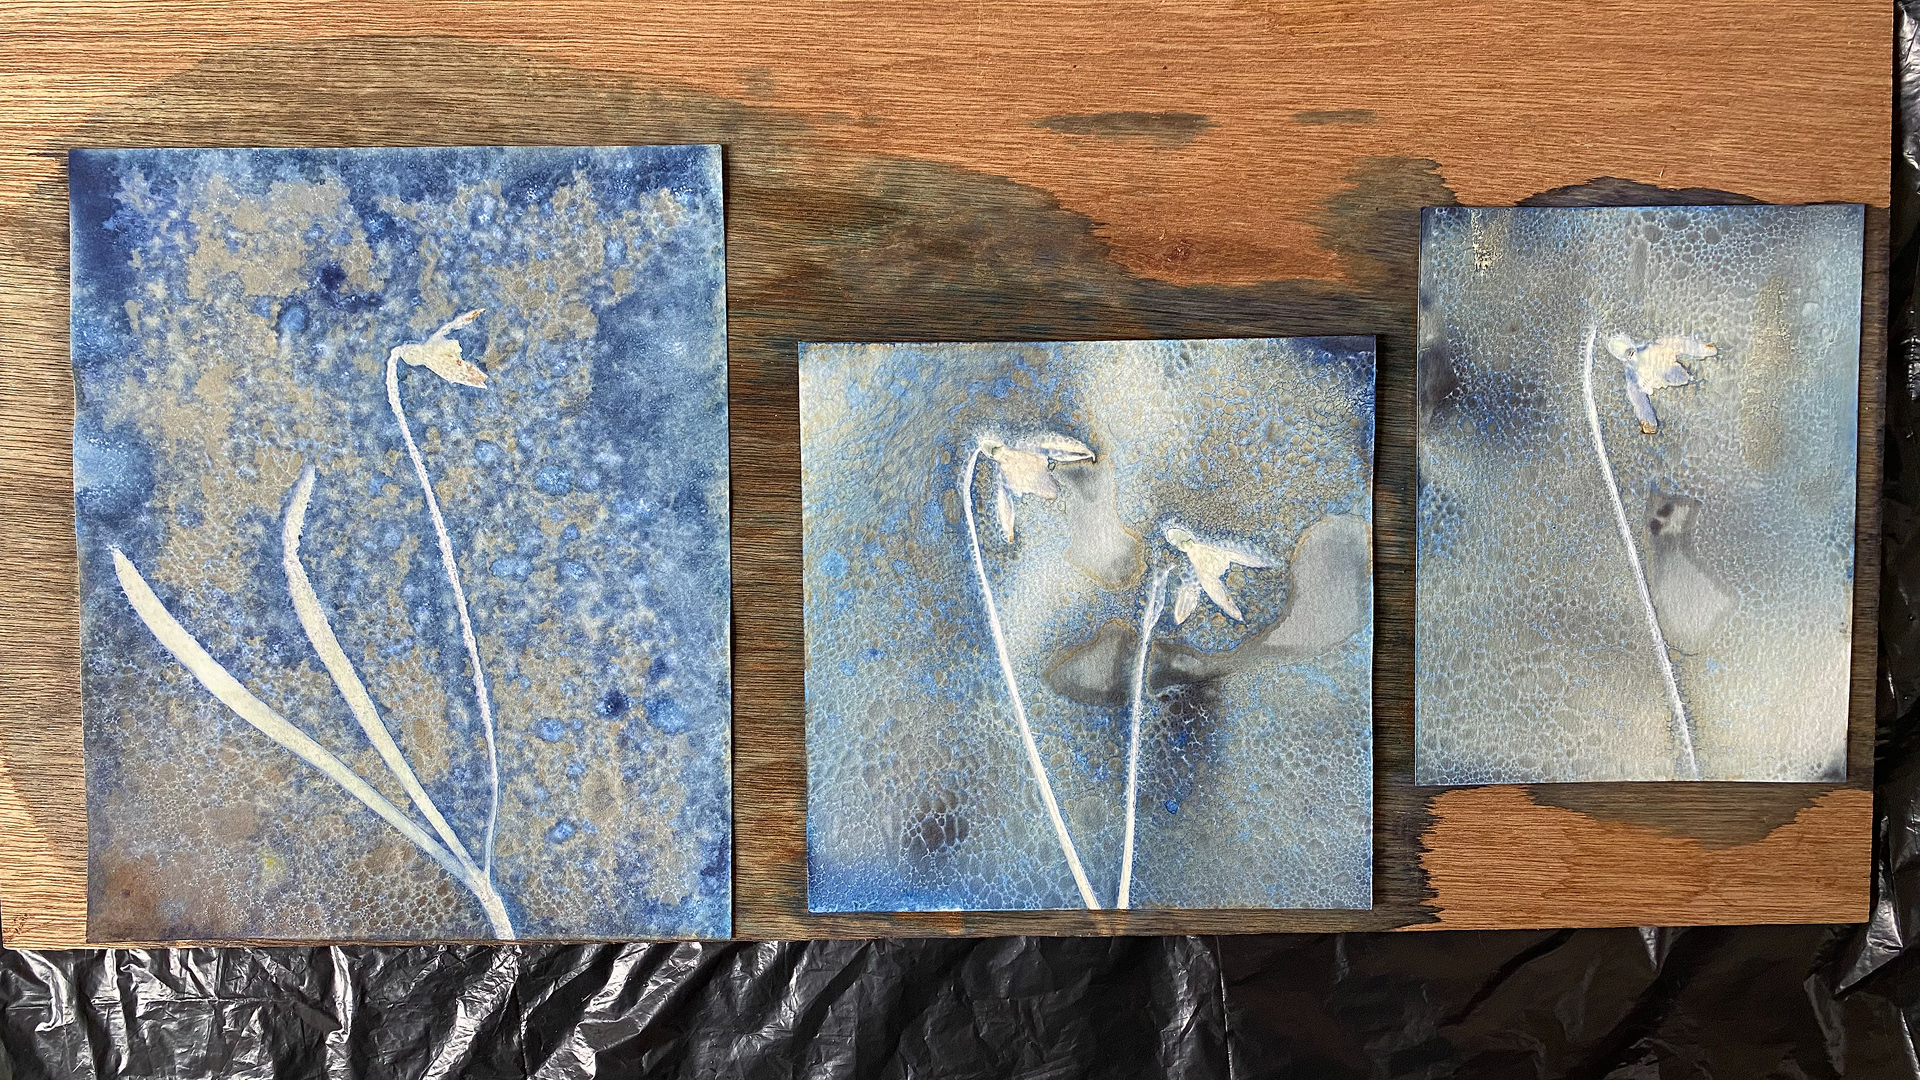
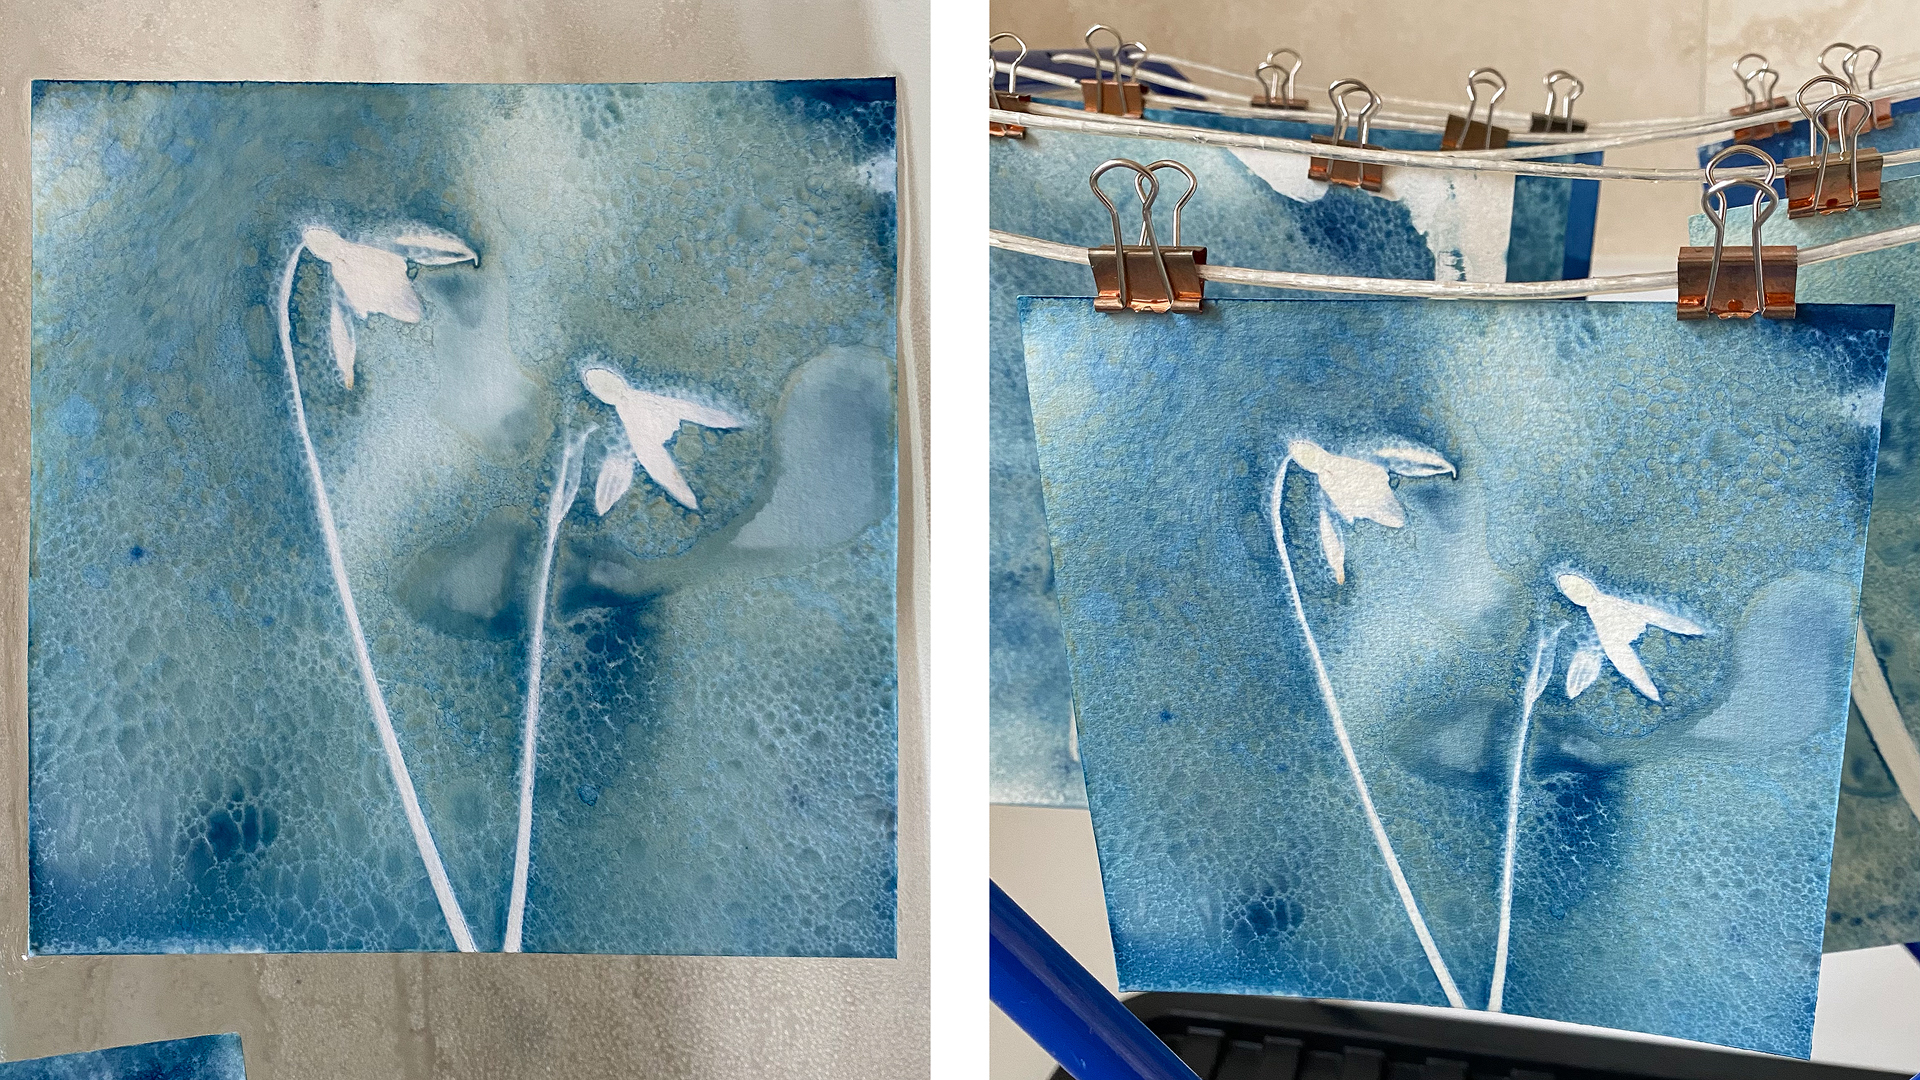
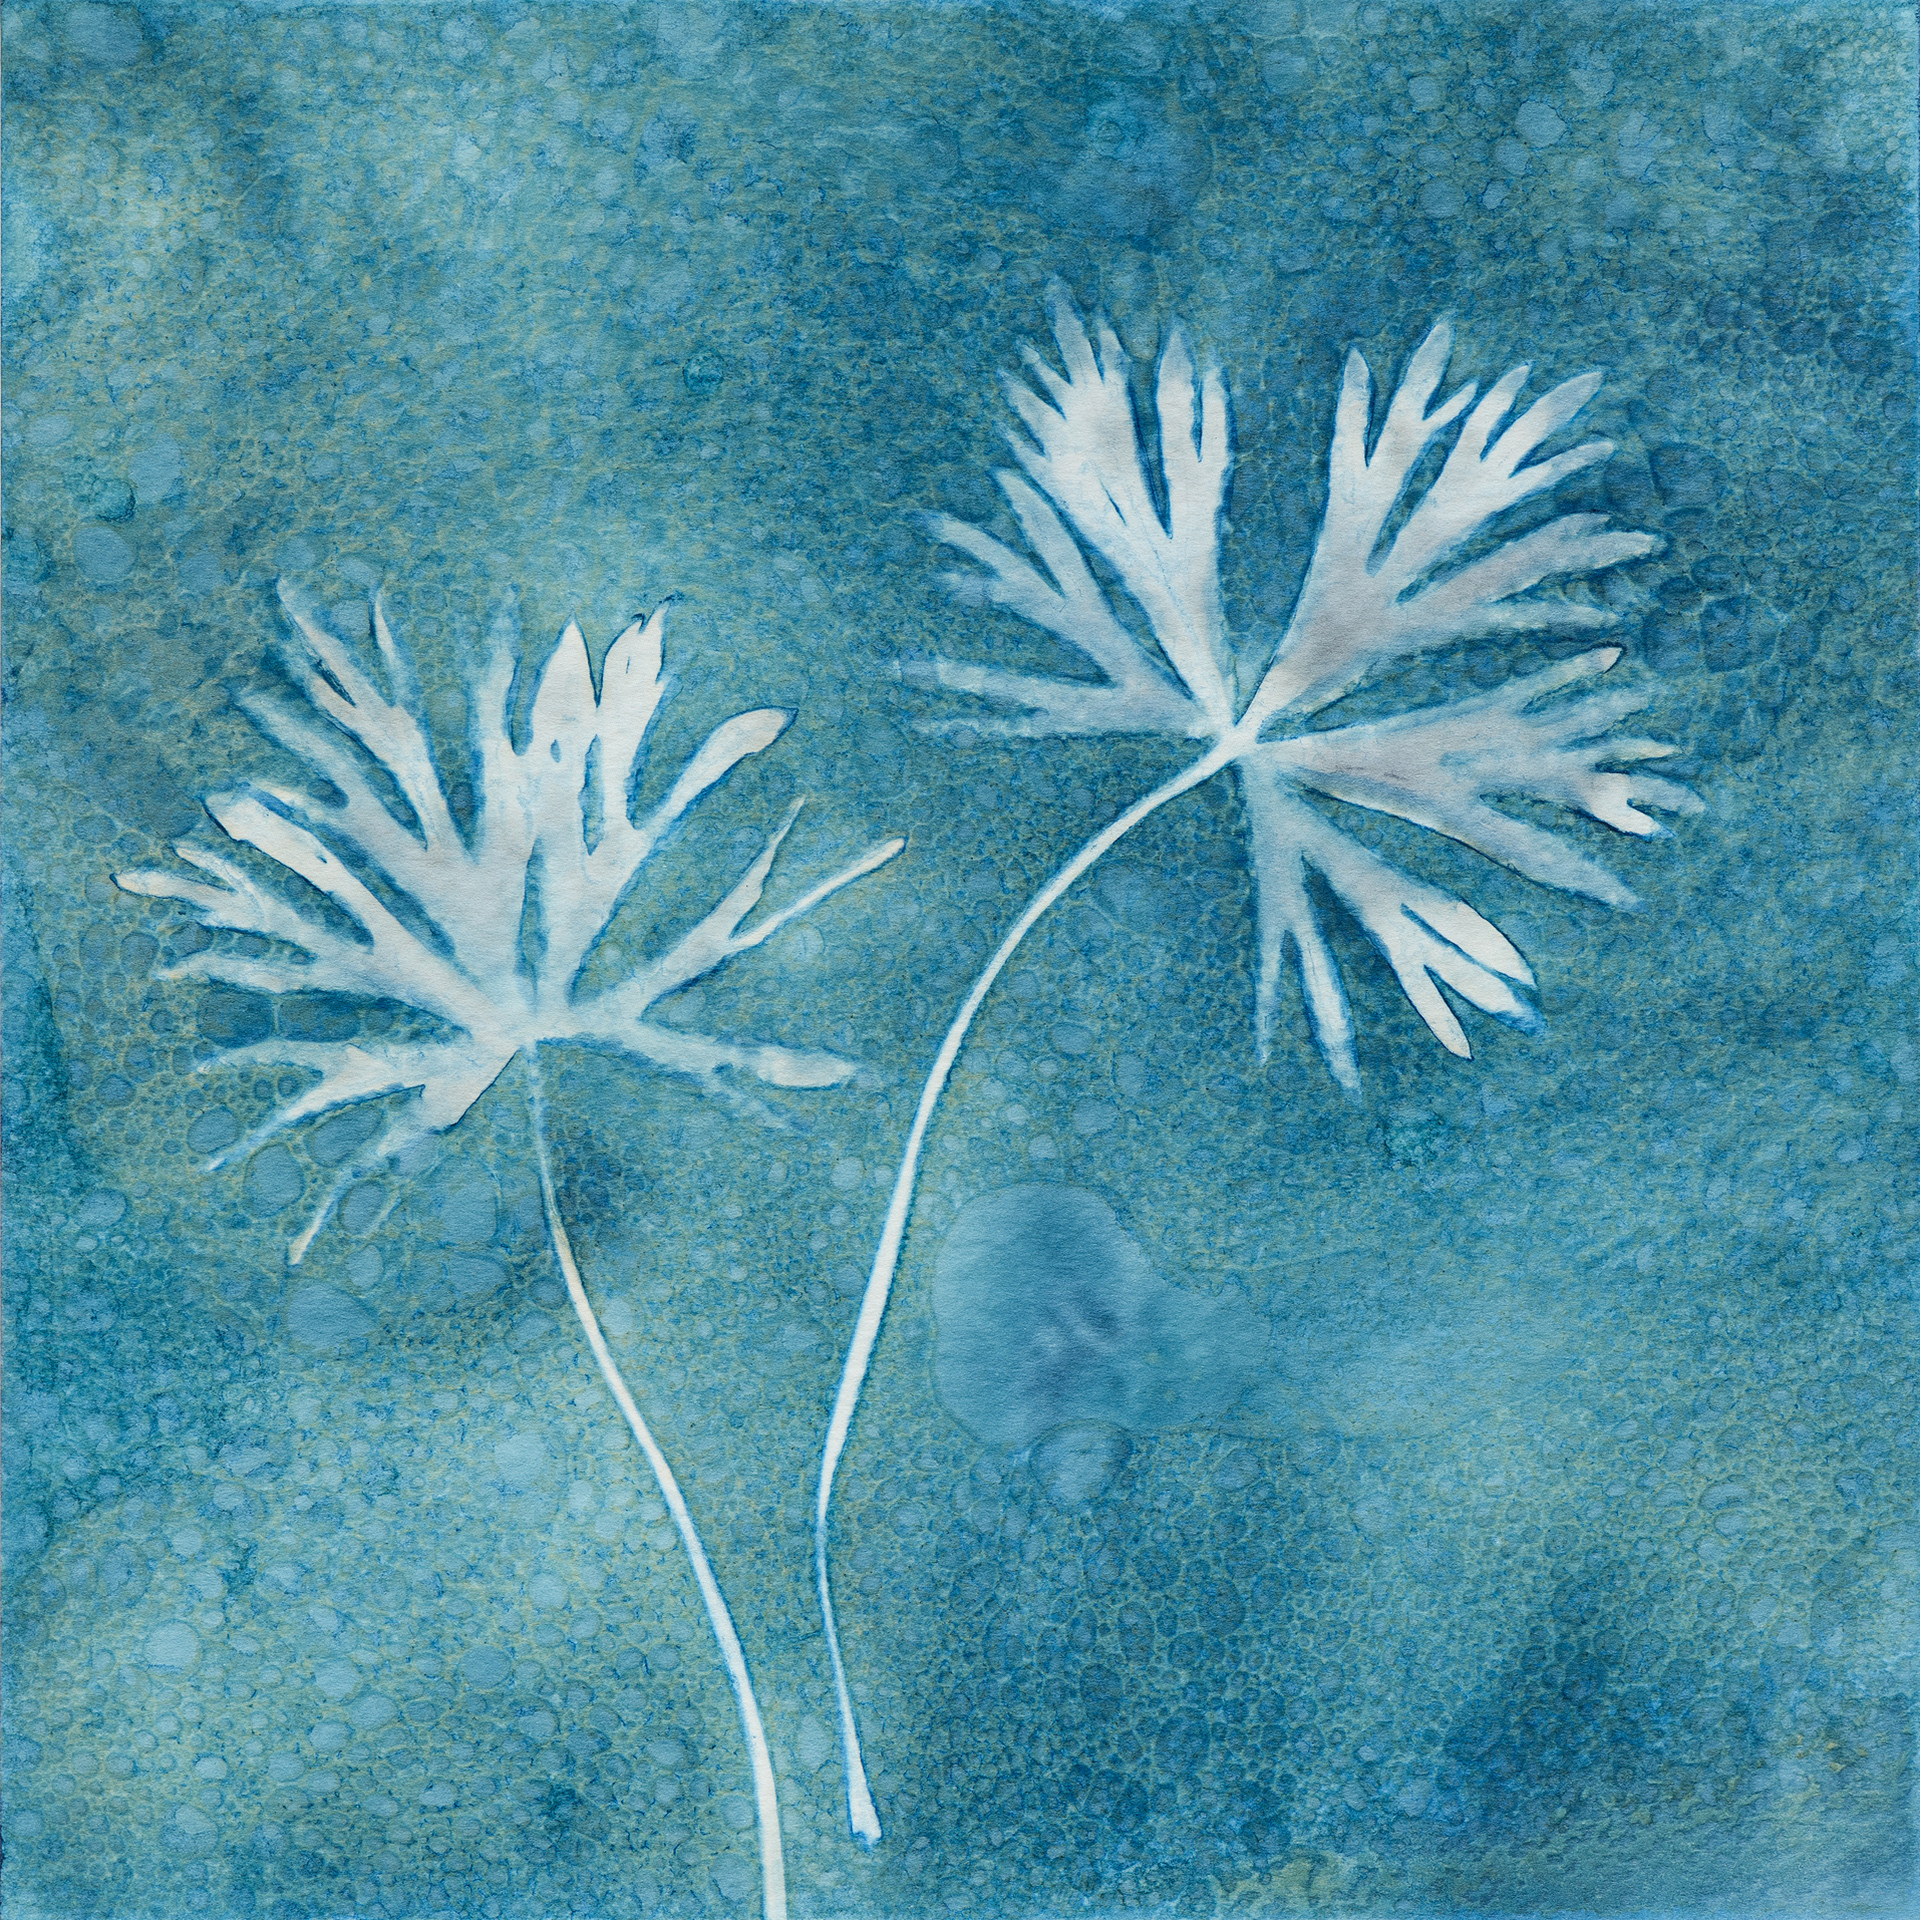
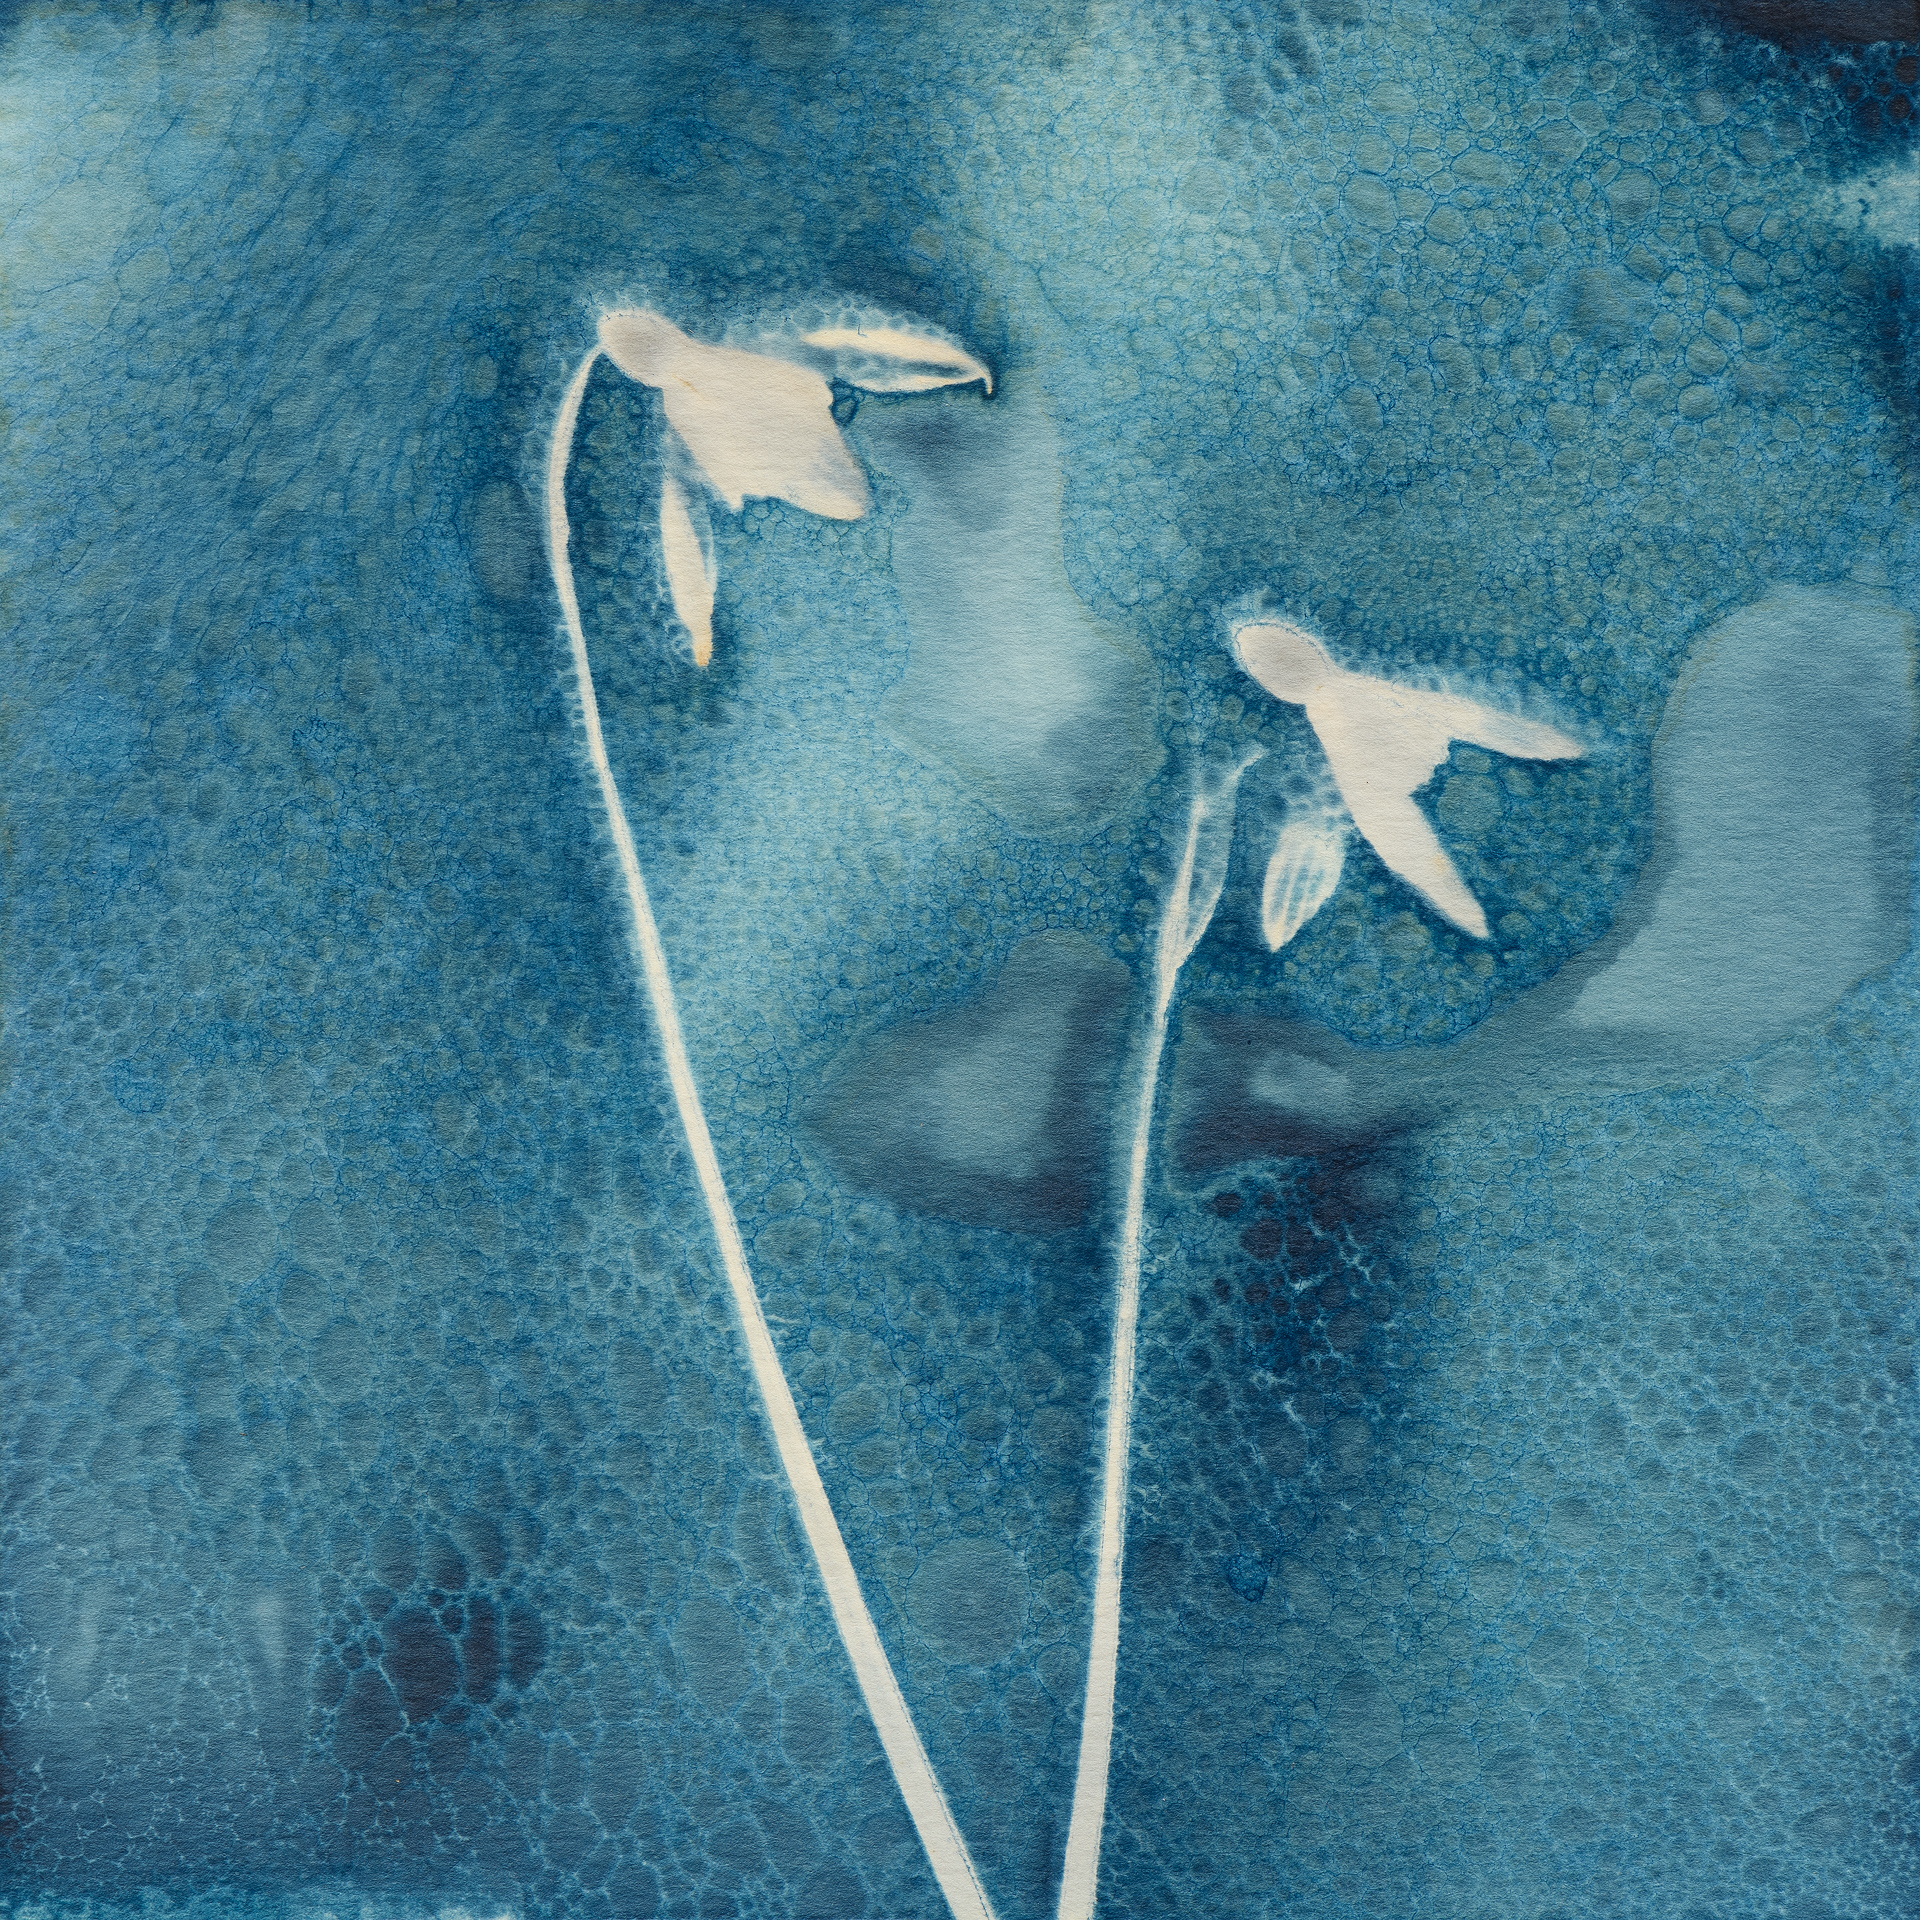
I must admit that I am completely hooked on this method now. I just love the unpredictability of it. You never know how the colours and textures are going to develop depending on the length and quality of the exposure. The blues come in all shades from almost green, turquoise, prussian blue to deep, dark teal. Sometimes there is yellow and red staining caused by leaching of xanthophylls and other plant pigments out of the leaves and flower cells into the paper. The yellow – greenish tones in the background are mostly caused by the vinegar solution and are particularly strong at the end of the exposure. Sadly some of that is lost after washing, drying & oxidisation of the image. The bubble texture is completely random as well and you have no control how it is going to flow when you put the glass on. Sometimes it even moves your carefully positioned plants. Because of the long exposure times you can often see some leaf and flower textures like leaf veins develop underneath the plant as the UV light has enough time to penetrate more delicate cell structures. The results are certainly always unique and to me constitute the perfect mix of a measure of deliberation, experience, control & happy accident.
One could take a more scientific approach and use a UV lamp to expose the images inside under standardised light conditions and develop exposure tables and such like, but I am not really interested in that. A big part of the fun of this process is how unpredictable, low-tech and hands-on it is. I like the idea of the sun conducting the exposure and any passing clouds helping to orchestrate it.
Sometimes the pressed plants survive the process and can be used again, but the resulting image is always completely different in colour and texture – a perfect antidote to a digital world full of mass production.
Sneak Peak Image Gallery
Below is my new Cyanotype image gallery which will be growing with time. I have to photograph my cyanotype originals to show them online, so be aware that they won’t be an exact match although I do make every effort to colour match them. The originals are quite small, the squares only 6″x 6″ and the rectangular images 7.5″x 5.75″ or 6″x 4.5″.


I hope you have enjoyed reading about my journey with Cyanotypes during lockdown. If you fancy one of these little gems for your wall, you are in luck, they are now for sale in the STRATHEARN ARTS GALLERY in Crieff and online in my shop.
Cyanotypes now for sale
The Originals of my cyanotypes are now for sale as framed and mounted images in my shop.
The cyanotypes are produced on 300gs matt, textured watercolour paper. Frames are made of wood in a choice of black or white, fronted with real glass, in either 9″x9″ or 8″x10″ depending on aspect ratio.
The images are small gems and also look great in pairs and small groups. Each image is absolutely unique and cannot be recreated.
Check out my shop for my current Cyanotype selection and for more information.